
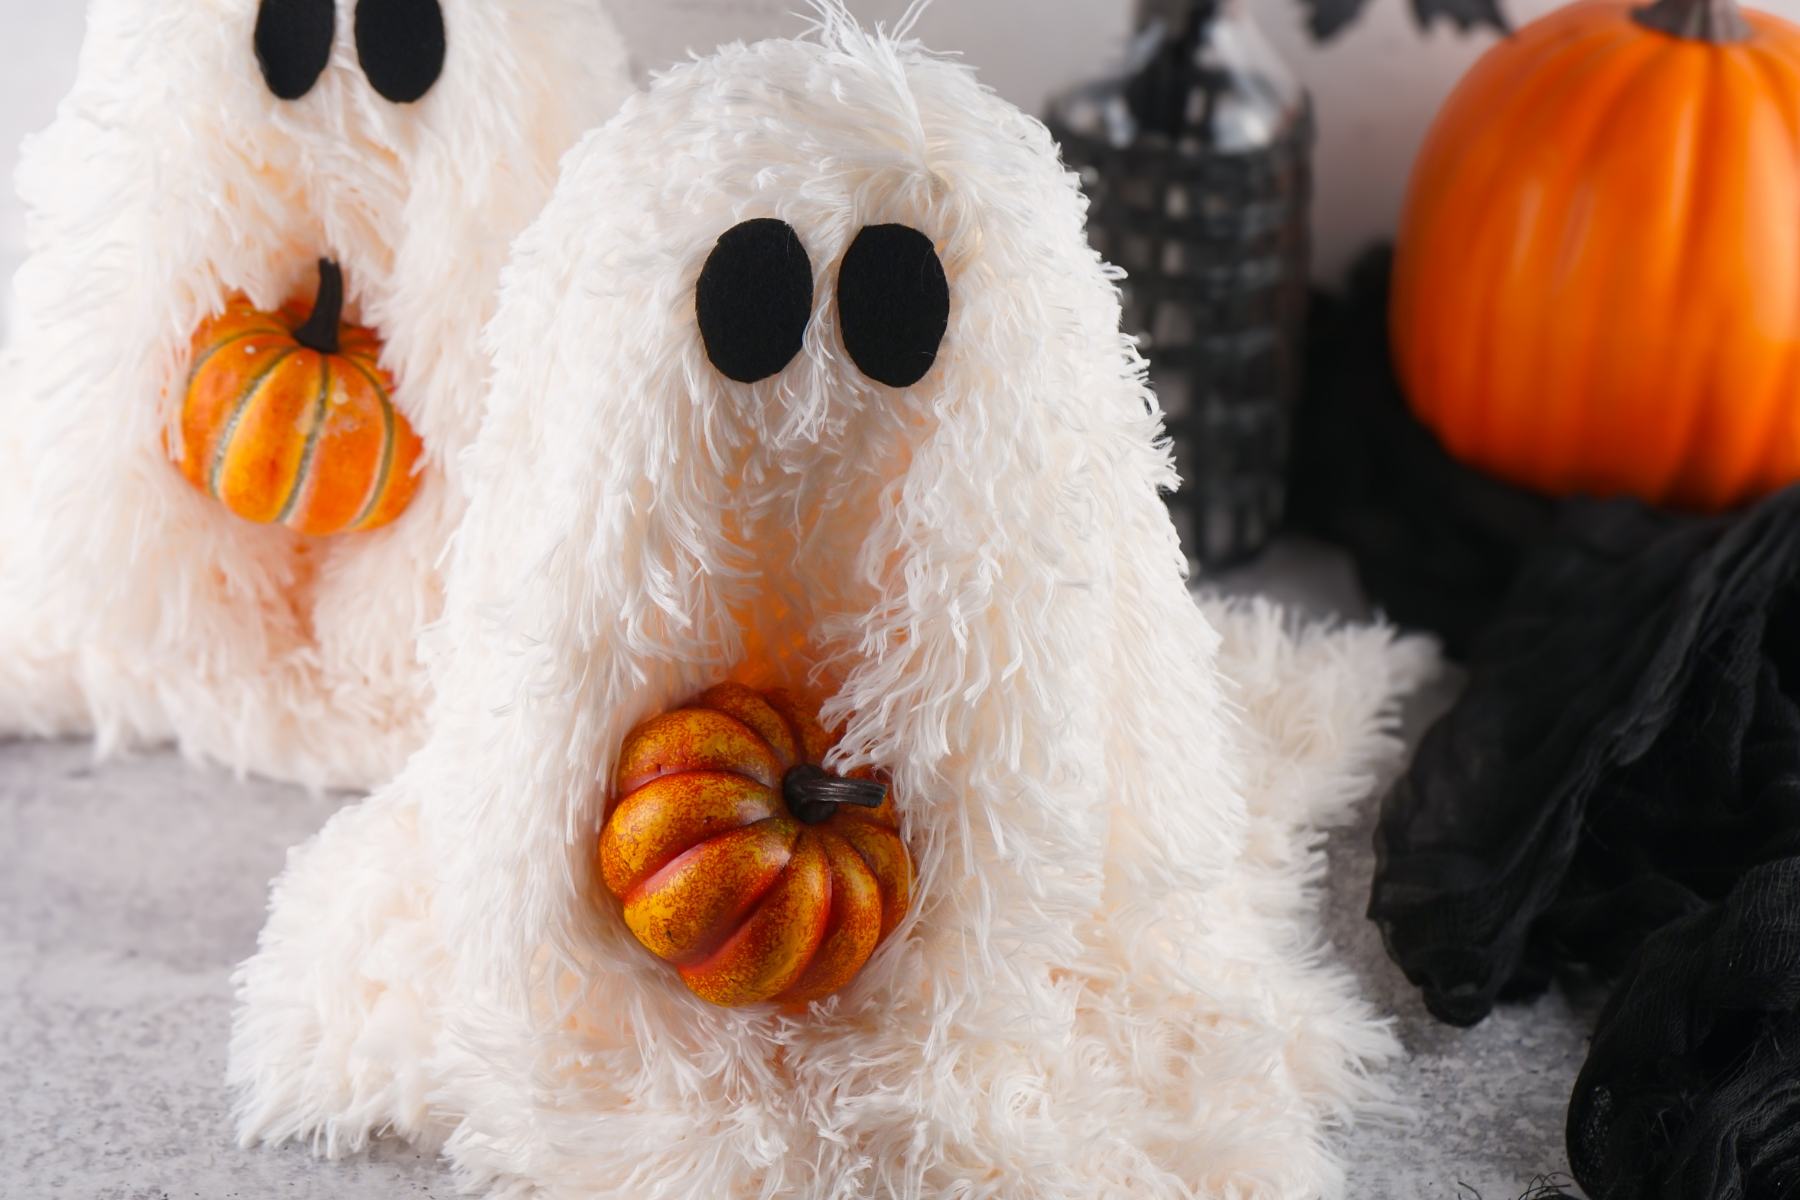
I keep seeing these viral sherpa ghosts popping up everywhere, and I can completely see why people love them. They’re ridiculously cute, really easy to make, and you only need a handful of supplies to put one together. I love Halloween decorations that look like you’ve spent far more time and money on them than you actually have, and this little guy definitely fits the bill.
You can keep your sherpa ghost really simple with a little pumpkin tucked into his hands, or have some fun changing him up to suit your own Halloween decor. The whole thing takes hardly any time to put together, and once Halloween is over, you can take most of it apart again for easy storage until next year.
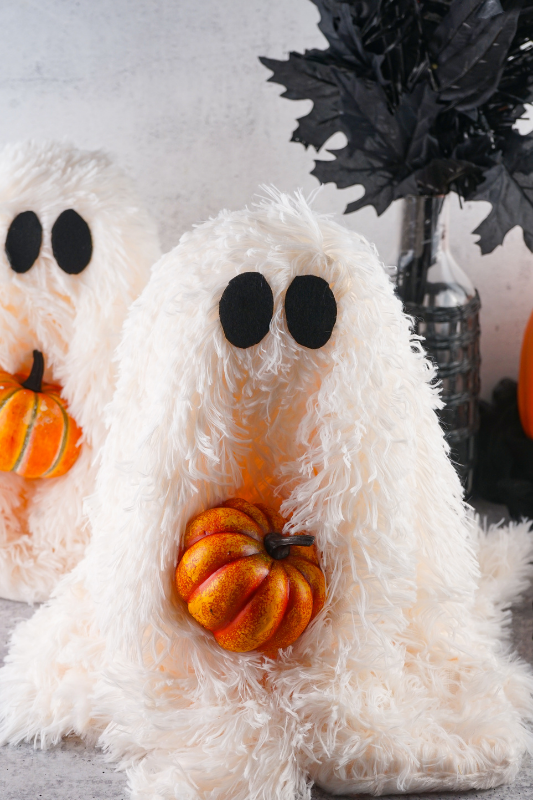
Why You’ll Love This Viral Sherpa Ghost
- It’s really easy to make. There’s nothing complicated involved and you can have your ghost put together in around 15 minutes.
- You don’t need loads of supplies. It only takes a few basic craft supplies, and you may already have some of them tucked away at home.
- It looks so much more expensive than it is. I love a cheap Halloween craft that doesn’t actually look cheap once it’s finished.
- You can make it your own. Swap the pumpkin for something else, add a little hat or bow, or make a few ghosts with different personalities.
- It’s easy to store. The sherpa doesn’t need to be permanently attached, so you can take it apart and pack everything away once Halloween is over.
Supplies You’ll Need
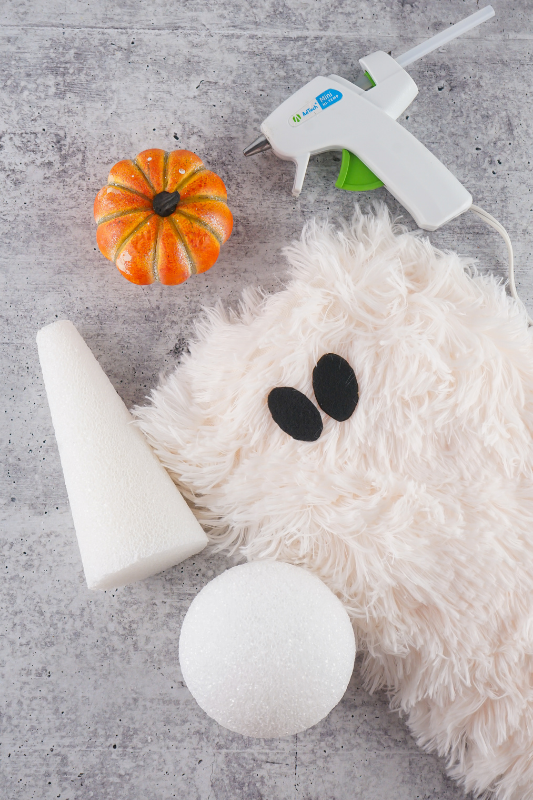
- 6-Inch Styrofoam Cone: This forms the body of the ghost, and you’ll want one with a flat top so the ball sits nicely on it.
- 3.8-Inch Styrofoam Ball: This becomes the ghost’s head and is simply glued onto the top of the cone.
- 26 x 26-Inch White Sherpa Material: This is what gives the ghost that lovely fluffy look, and I like using a slightly bigger piece so there’s plenty of fabric to drape around the bottom.
- Small Fake Pumpkin: This sits between the folds of sherpa so it looks like your little ghost is holding it in his hands.
- Two 1½-Inch Black Felt Ovals: These make the eyes, and you can easily cut them yourself from a cheap sheet of black felt.
- Glue Stick: You only need a small amount of hot glue for this craft, so one glue stick should be plenty.
- Hot Glue Gun: This makes it really quick and easy to attach the head, pumpkin, and little felt eyes securely.
How to Make a Viral Sherpa Ghost
Step 1: Plug in your hot glue gun, add a glue stick, and leave it for a few minutes to heat up.
Step 2: If you haven’t already made the eyes, cut two oval shapes from your black felt and set them aside ready for later.
Step 3: Glue the Styrofoam ball onto the top of the cone, making sure it’s sitting centrally. Gently hold it in place for around 30 seconds, then leave it for another minute or so to make sure the glue has set.


Step 4: Drape the sherpa fabric over the ball and cone, adjusting it until the fabric hangs fairly evenly all the way around. Be gentle while moving it around so you don’t pull the Styrofoam ball away from the cone. There’s no need to glue the sherpa in place. It should stay put once everything is positioned, and leaving it loose makes the ghost much easier to take apart and store after Halloween.
Step 5: At the front of the ghost, gather the sherpa into two small folds, one on either side. These are going to look like the ghost’s little hands holding the pumpkin, so play around with them until you’re happy with the position. You don’t need to glue the folds themselves.

Step 6: Tuck the small pumpkin between the two folds and adjust it until it looks like your ghost is holding it. Add a little hot glue to one side of the pumpkin and press the sherpa against it, then repeat on the other side. Hold the fabric against the glued areas for around 20–30 seconds while the glue starts to set.
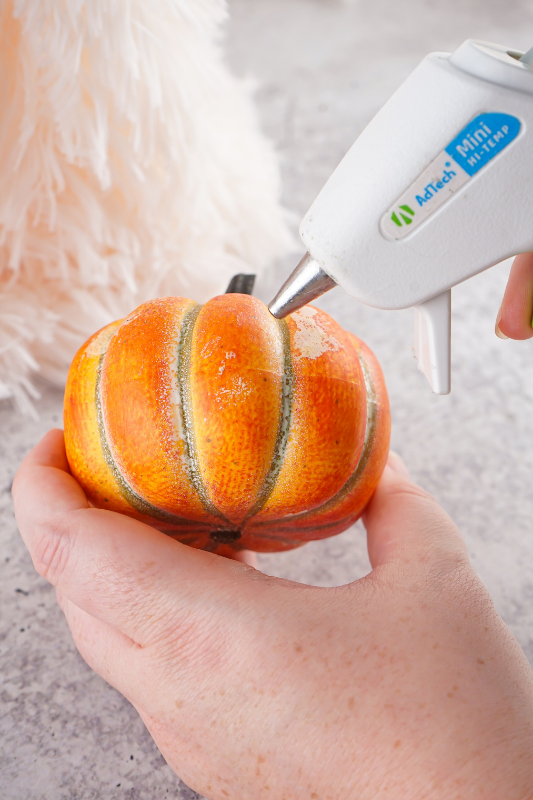
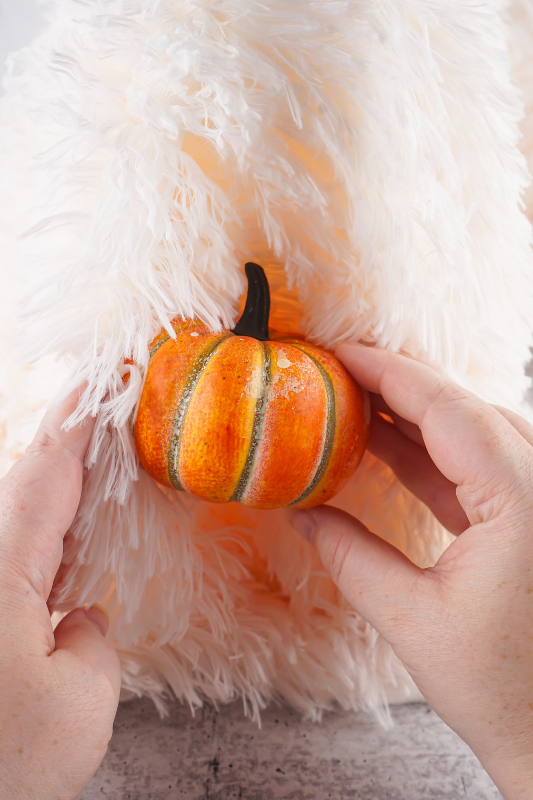
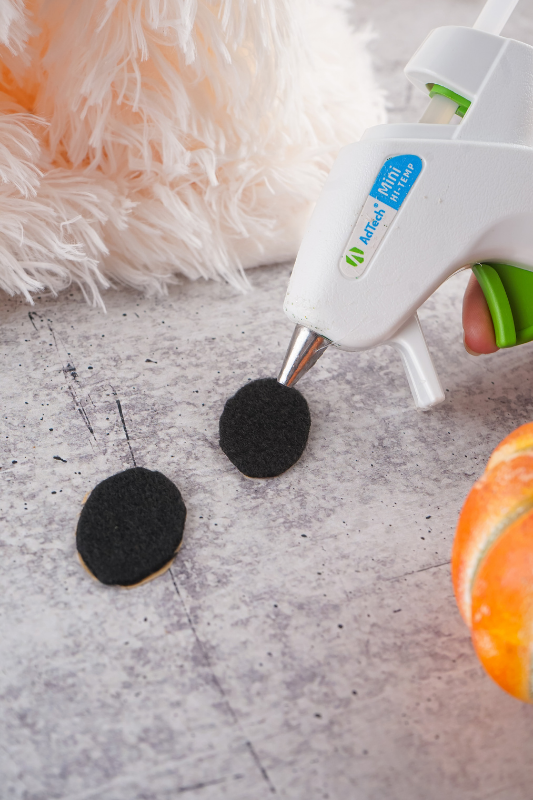
Step 7: Add a small dab of hot glue to the back of one felt eye and position it toward the upper middle of the ghost’s face. Press it in place for around 20–30 seconds, then repeat with the second eye.
Step 8: Give everything a final little adjustment, then find the perfect spot to display your new sherpa ghost!

Tips for the Best Results
- Don’t worry about getting the sherpa perfectly even. A little extra fabric here and there actually helps give your ghost that soft, flowy look, so there’s no need to spend ages trying to make every side match.
- Use a flat-topped cone if you can. It makes attaching the Styrofoam ball much easier. If you can only find a pointed one, you can carefully cut the tip off to give yourself a flat surface.
- Give the hot glue a little time to grab. Hold the pieces together for 20–30 seconds rather than letting go straight away, especially when attaching the pumpkin and eyes to the fluffy sherpa.
- Play around with the pumpkin before you glue it. It’s worth getting the folds of fabric and pumpkin exactly where you want them first because those little “hands” are what make this ghost look so cute.
- A slightly bigger piece of sherpa gives you more to work with. You can use a 24-inch square, but I prefer 26 inches as you get a little more fabric around the bottom and it gives the ghost a looser, more flowy look.
- Don’t glue the sherpa to the cone unless you really need to. The fabric should stay in place without it, and keeping it loose makes everything much easier to take apart and store when Halloween is over.

Where to Find Cheap Sherpa Fabric
You definitely don’t need to spend loads on sherpa fabric for this. It’s worth having a look at cheap sherpa throw blankets, especially if you spot one on sale, as you can usually get enough fabric from one blanket to make several ghosts. Just check whether the blanket has a separate backing layer before you start cutting it up. If it does, you might need to glue or sew the cut edges, or you can be sneaky like me and keep the finished edge facing forward where everyone can see it.
Another really cheap option is to look for sherpa car cloths or towels at the dollar store. Lots of people use these for their viral sherpa ghosts and they’re usually about the right size. I personally prefer the look of proper sherpa fabric as I think it hangs a little nicer, but that’s completely down to preference. Have a look at what you can find cheaply before buying anything especially for this. Fabric by the yard, an old sherpa blanket or a dollar store find can all work.
Ways to Customize Your Sherpa Ghost
One of the things I love about these little ghosts is how easy they are to change up. The pumpkin is really cute for Halloween, but you definitely don’t have to use one. You could tuck a little wooden spoon into his hands for a kitchen ghost, use a tiny stuffed animal, or even add some faux flowers. It’s quite fun thinking of different things for them to hold.
You can play around with the ghost itself too. Add a miniature witch hat, a little bow, some ribbon or anything else you happen to spot in the craft store. If you’re making more than one, I’d be tempted to give each of them something different so you end up with a whole little ghost family. There really aren’t any rules with this one, which is part of the fun.
How to Store Your Sherpa Ghost
One of the good things about not gluing the sherpa to the cone is that this little ghost is really easy to store once Halloween is over. Simply lift off the sherpa fabric, fold it up neatly and pop it into a bag before putting it away with the rest of your Halloween decorations. This should help keep it clean and stop it getting caught on anything while it’s packed away.
The Styrofoam cone and ball can go straight into your Halloween storage tub ready for next year. I’d avoid putting anything too heavy on top of them as Styrofoam can dent quite easily. Then when Halloween rolls around again, you can simply drape the sherpa back over the top, give everything a little adjustment and your ghost is ready to come back out.


Viral Sherpa Ghost
This adorable viral sherpa ghost is such a fun and easy Halloween craft. Made with a simple Styrofoam cone, fluffy sherpa fabric and a little pumpkin, it takes around 15 minutes to put together and looks so cute displayed with your Halloween decor.
Materials
- 1 (6-inch) Styrofoam cone
- 1 (3.8-inch) Styrofoam ball
- 1 (26 x 26-inch) piece white sherpa fabric
- 1 small fake pumpkin
- 2 (1½-inch) black felt ovals
- 1 glue stick
Tools
- Hot glue gun
- Scissors
Instructions
- Plug in your hot glue gun, add a glue stick, and leave it for a few minutes to heat up.
- If you haven’t already made the eyes, cut two oval shapes from your black felt and set them aside ready for later.
- Glue the Styrofoam ball onto the top of the cone, making sure it’s sitting centrally. Gently hold it in place for around 30 seconds, then leave it for another minute or so to make sure the glue has set.
- Drape the sherpa fabric over the ball and cone, adjusting it until the fabric hangs fairly evenly all the way around. Be gentle while moving it around so you don’t pull the Styrofoam ball away from the cone. There’s no need to glue the sherpa in place. It should stay put once everything is positioned, and leaving it loose makes the ghost much easier to take apart and store after Halloween.
- At the front of the ghost, gather the sherpa into two small folds, one on either side. These are going to look like the ghost’s little hands holding the pumpkin, so play around with them until you’re happy with the position. You don’t need to glue the folds themselves.
- Tuck the small pumpkin between the two folds and adjust it until it looks like your ghost is holding it. Add a little hot glue to one side of the pumpkin and press the sherpa against it, then repeat on the other side. Hold the fabric against the glued areas for around 20–30 seconds while the glue starts to set.
- Add a small dab of hot glue to the back of one felt eye and position it toward the upper middle of the ghost’s face. Press it in place for around 20–30 seconds, then repeat with the second eye.
- Give everything a final little adjustment, then find the perfect spot to display your new sherpa ghost!
Notes
- A 24-inch square of sherpa will work, but 26 inches gives the ghost a fuller, more flowy look.
- If your Styrofoam cone has a pointed top, carefully trim it flat before attaching the ball.
- There’s no need to glue the sherpa to the cone, which also makes the ghost easier to store.
- Position the pumpkin and fabric folds before adding any glue so you can get the look you want.
- Try swapping the pumpkin for a mini broom, wooden spoon, flowers, or another small Halloween accessory.
- Cheap sherpa blankets or dollar store sherpa cloths can be used instead of fabric by the yard.